
News:
Construction Design & Engineering
Posted: February 18, 2009
Anatomy of a medallion: Restoration using skills of yesterday and technology of today
Ornamental plaster is the type of work that requires skill and patience to do but is never monotonous. Some days I make rubber molds or carve details or make run-in-place cornices. Other days I cast from the molds creating ceiling medallions, brackets, niches, columns, capitals and bases. Still other days I might be working on a domed, groined, vaulted or coffee ceiling, or manufacturing precast cement to look like limestone or brownstone.
Over the years I have been fortunate to collect and reproduce many architectural details. The ceiling medallion (shown right) came out of a brownstone in Boston's South End. The process I'll describe involves five major steps preparing to make the model, making the template, making the model, making the rubber (and mother) mold, and casting the medallion.
Preparation for making the model begins with removing all of the paint (this one had 15 to 20 layers) to reveal the model's original detail. Next you make molds of each enrichment within the medallion. This one had four enrichments: a bead and reel, acanthus leaf and scallop, acanthus leaf and daisy, and a smaller bead in the center.
After molds and casts are done the next step is to make a template. To do so you cut the medallion in half and trace the original profile to make the template so you can recreate the shape by spinning the template over the wet molding plaster. This is done by adding plaster over the reinforcing and turning the template over the plaster, repeating this process over and over until the medallion's shape is formed without holes or voids. The next step after the plaster sets is to apply enrichment casts to the newly spun medallion. Last, you have to point in the enrichments.
In order to make the rubber mold you first have to seal the medallion and make a mother mold (this mold holds the rubber in its place otherwise the rubber would flop around when casting from it and not come out right). Now you can pour the rubber and let it set for 24 hours.
The last step is to cast from the new rubber. This is done by mixing plaster, pouring it into the mold, adding reinforcement and waiting for the plaster to set. Then you remove the rubber mold from the mother mold and peel the rubber off the cast.
Restoration work is very gratifying because you can replicate old world designs. But I also enjoy working with architects, designers and home owners who are creative and realize that they can design what they want instead of settling for catalog products often made from foam, pressed wood and fipon, but not plaster. There is nothing like real plaster for deep relief and true detail.
I have been practicing ornamental plaster now for 20 years. I learned from my father and brother and gained a great deal of experience from all the great projects my family did, including libraries, town halls, state houses, train stations (Boston South Station), theaters (Boston Symphony Hall) and many Newport mansions. But most of the time the work was in Boston's Back Bay, South End, Charlestown and Beacon Hill. I began my own business in 2000. In 2003, Local 534 (Boston's Plasterers and Cement Union) asked me to work on the Boston Opera House, a 10-month project during which I became the foreman. In 2004, Austin Ornamental incorporated and became a signatory company with the union.
Sheldon Austin is president of Austin Ornamental, Dedham, Mass.
MORE FROM Construction Design & Engineering
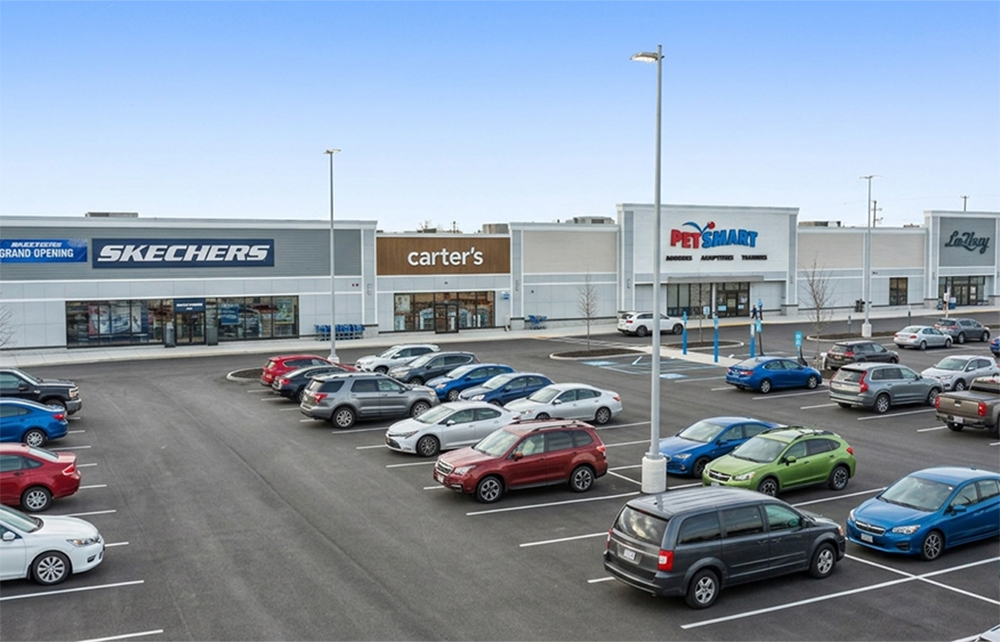
Project of the Month: Onyx Partners’ Springfield Crossing transforms former Eastfield Mall into Western Mass.’ premier retail destination
Springfield, MA The redevelopment of the former Eastfield Mall into Springfield Crossing has transformed a long-vacant enclosed mall into a new 360,000 s/f regional power center, one of the largest retail redevelopments completed in Western Massachusetts in recent years.


Quick Hits


Columns and Thought Leadership

It’s time to lead: Confronting mental health in construction - by David Watts
As we close Mental Health Awareness Month, we must be clear: May isn’t just about ribbons, hashtags, or lunchtime mindfulness apps. It’s about responsibility to confront hard truths that linger in silence, and to challenge ourselves, as leaders in our industry, to do more.

Navigating tariffs and material uncertainty in today’s construction market - by Karl Ginand and Tiffany Gallo
As headlines around tariffs seem to dominate the news daily, many considering construction projects have anticipated major cost escalations and widespread supply issues. While tariffs haven’t driven pricing spikes to the extent once feared, the lasting impact has been a new layer of uncertainty, affecting more than just budgets.

ABC-Mass. chairman’s message: Rent control isn’t the answer to our housing crisis - by Luiza Mills
As you may know, Massachusetts voters will be weighing in on a number of ballot initiatives in November. Among them is a proposal to impose the nation’s strictest statewide rent control policy. I’d like to tell you why the ABC MA Board

Greenwood Credit Union City Hall Plaza nears completion - by Frank Picozzi
After several years of planning, construction, and anticipation, the community is eagerly awaiting the opening of the Greenwood Credit Union City Hall Plaza and outdoor skating rink later this month.